I finally sat down and just did it- here's my very first video tutorial, for one of my recent favorite mildly-dressy style. It basically looks like Heidi braids- only done with 2 tichels and a ribbon. Think of it as a braided variation on the dutch crown, but with only a very moderate amount of height added.
So without further ado:
If that doesn't work for you, here's the link to it on youtube.
Showing posts with label scarf-tying instruction. Show all posts
Showing posts with label scarf-tying instruction. Show all posts
Tuesday, December 10, 2013

Sunday, October 13, 2013
My Fascination With Twisty Crowns Continues
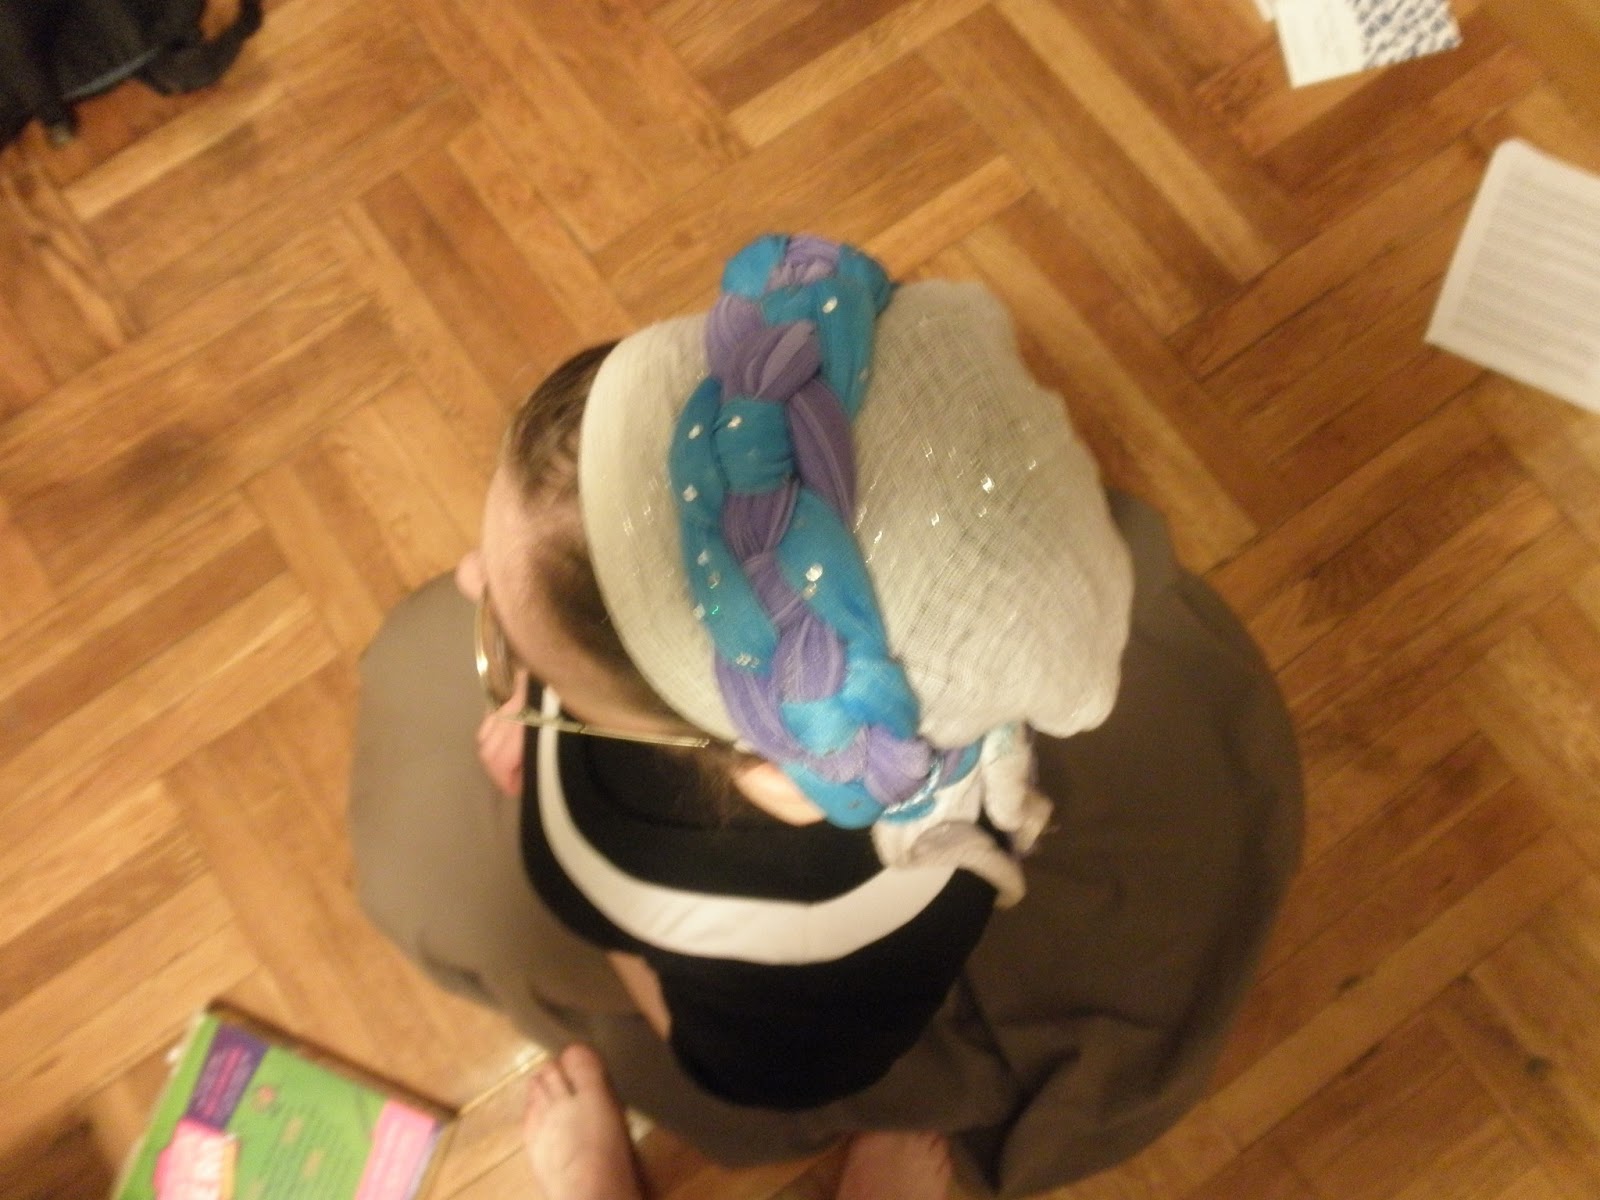
I went to an outdoor wedding a while ago- a very good friend from college got married. It was a picnic-style wedding. So I was aiming for something that looked really festive, but wasn't too formal, and would put up with dancing, eating, hanging out, outside. Most of my coverings are pretty stable, honestly, but it meant that adding sparkly things kept on only by bobby pins didn't have quite the appeal that it usually does for me. Here's what I came up with:

It's made up of: 1 square scarf, folded into a triangle (blue with stripes) , 1 rectangular scarf (purple pattern), and 1 small square scarf (light green), roughly folded into a band.
I put on the base scarf, and left the tails dangling. Then I twisted the purple rectangle and the green square around each other, in the same manner as I do the tails for the twisty crown, (Wrapunzel has a how-to here) so that the middles of each scarf were together. I tied that around my head, using up all the green scarf, but leaving tails on the purple one.
I then twisted one blue triangle tail with one purple rectangle tail in the same fashion, and wrapped it over my head, behind the purple-and-green twist. The purple reached about half-way around, the blue reached all the way. I tucked in the blue tightly, and used it to secure the purple. I then repeated the same thing with the other side, tucking under the first blue-and-purple combo. I threw in a bobby pin in the middle to help keep things secure.
I then added a small black and white headband to set off the two crowns.
The whole thing stood up to dancing, pincnicking, hula hooping, and 3 young relatives.
Monday, September 9, 2013
A Basic Link
Here's a handy link to a video demonstrating how to use a pashmina scarf in place of a volumizer, for those of us who don't have one, from The Daily Tichel.
I've yet to try her technique out (very similar to the one on Wrapunzel, although I'm too lazy to go find the right video to link to, right now). I'll let you know how it works for me when I do.
Wednesday, August 28, 2013
My Ambivalence About How-To Style Videos
I just came across a bunch of how-to videos that Judith De Paris, an online tichel seller, has up, explaining how to put on the various styles of scarves that she sells. She sells a lot of scarves that are cut specifically for head covering, so they have different shapes and whatnot, and I imagine that a quick how-to is quite useful.
(I've never bought or made a scarf in one of these styles, as I generally try to be pretty thrifty, and these tend to be a little more money than I want to invest in one scarf. I have thought about making one, in one of the styles.)
However, these how-to videos all basically say "this is the one right way to wear this thing".
I've got to disagree. This is the simplest way to wear that scarf. It's the most obvious. But the only way? No.
I want head covering to be a way that I express my creativity. It's a way of bringing your own sense of beauty and artistry into this mitzvah on a daily basis (or however often you cover, or however often you find time and inspiration to be creative with it).
I want to ask those videos- can I mix this specialized item with another regular scarf? What about with additional accessories? Can I fold it up in some way if I feel comfortable showing some of my hair, and want to, that day?
I want to have fun, not just be beautiful in a prescribed way. This is my adult woman's version of dress-up. Does this scarf play nicely with others?
(I've never bought or made a scarf in one of these styles, as I generally try to be pretty thrifty, and these tend to be a little more money than I want to invest in one scarf. I have thought about making one, in one of the styles.)
However, these how-to videos all basically say "this is the one right way to wear this thing".
I've got to disagree. This is the simplest way to wear that scarf. It's the most obvious. But the only way? No.
I want head covering to be a way that I express my creativity. It's a way of bringing your own sense of beauty and artistry into this mitzvah on a daily basis (or however often you cover, or however often you find time and inspiration to be creative with it).
I want to ask those videos- can I mix this specialized item with another regular scarf? What about with additional accessories? Can I fold it up in some way if I feel comfortable showing some of my hair, and want to, that day?
I want to have fun, not just be beautiful in a prescribed way. This is my adult woman's version of dress-up. Does this scarf play nicely with others?
Tuesday, August 20, 2013
Turban-Style Wraps
As I return to a realistic schedule, I'm working my way back to blogging. Here are some of the wraps I've been playing with lately. I'm experimenting with some scarves in more turban-like styles. (If there's a technical definition of a turban, I haven't found it yet.) Here's what I've been coming up with. Please tell me what looks worth repeating, or if better instructions might make it worth trying yourself. Pictures are always welcome too.
1. This one looked a little wimpy without the pin, but I quite like it with. It's done with a scarf folded into a triangle, with the point facing the face, and the wide part at the back. The ends wrap around, and the twist at the front is the wide/third point of hte triangle, twisted back and tucked. I set it a little to the side, for better effect.
 I also played with some variations with the front corner folded under instead, but I'm not finding a good picture right now.

 2. Here's another start-from-the-back turban, done with a large rectangular scarf, twisted, with the twist brought around the back.
 I really like the back. I'm less sure about the front. It may take more experimentation.
 Here's the other side, where the twist doesn't show so much.
One of the interesting things about these wraps is how much less tying and knotting there is. They felt pretty secure while I was playing with them. I haven't done a full day wear yet.
3. This last one, I have worn all day a few times. It's a bit closer to my usual- I found a how-to video somewhere, I'll have to dig it up again. It starts in front, criss-crosses the ends in back, and brings them forward and ties a knot at the top of the head (usually to one side a bit), then tucks the ends back in, in back or wherever. It's very fast and easy, and looks pretty good, I think. It is a bit tricky to get tefillin on over this one, though, like with most styles that put bulk over the head rather than around the bun.

1. This one looked a little wimpy without the pin, but I quite like it with. It's done with a scarf folded into a triangle, with the point facing the face, and the wide part at the back. The ends wrap around, and the twist at the front is the wide/third point of hte triangle, twisted back and tucked. I set it a little to the side, for better effect.
One of the interesting things about these wraps is how much less tying and knotting there is. They felt pretty secure while I was playing with them. I haven't done a full day wear yet.
3. This last one, I have worn all day a few times. It's a bit closer to my usual- I found a how-to video somewhere, I'll have to dig it up again. It starts in front, criss-crosses the ends in back, and brings them forward and ties a knot at the top of the head (usually to one side a bit), then tucks the ends back in, in back or wherever. It's very fast and easy, and looks pretty good, I think. It is a bit tricky to get tefillin on over this one, though, like with most styles that put bulk over the head rather than around the bun.
Sunday, June 23, 2013
A Twisty Crown: A Shabbos or Mildly Dressy Style

I noticed that while this worked really well for me, I tried it out on my sister-in-law, and her head is a bit larger than mine- and the two twists weren't quite long enough to work out well. So if you have a large head, you may want to use longer scarves than I did. I imagine that you could use two separate scarves (both rectangles, I guess), wrapped around a separate scarf, which would give you a little bit more length to play with, and a different look. I think I've given myself a new idea to play with.


Here's a general how-to:
1. Tie your square scarf with the back corner tucked in. Keep your tails available.
2. Tie your rectangular scarf over it, keeping the tails of the first scarf available. For this exact style, don't leave any of the first scarf showing in front. (But that might be a nice variation, especially if you have some more space before where you want the twists. Since I tend to show a little hair in front, I have less space.)
3. Arrange your tails with one from each scarf over each shoulder, so you have them in pairs.
4. Take the tails on one side. Twist them each to the right, and wrap them around each other to the left (or vice versa.) Secure at the bottom with a hair elastic.
5. Repeat with the other side.
6. Take both twists, and criss-cross them over your head, weaving them together, and tucking in the ends.
7. Adjust your placement, or any other fidgeting that you like to do.

And here's a close-up of my results:

Friday, May 3, 2013
Using Braids
As a kid, I wore my hair in braids pretty much all the time. Really- one braid or two, usually french-braided, was my go-to for years. I'd brush my hair, then go sit down in front of my mother's bed, and she'd braid my hair while she listened to NPR and I read.
I have a long history with braids, in other words. And I love them, they're beautiful. I enjoy playing with different braids for challah, and braiding the dangly edging of my scarves when I'm bored.
I also love playing with braids on my coverings. In the past, I've braided the ends of my scarves, or taken those braided ends and wrapped it around a bun.
This time, I made a braid first, then tied it on around my head.


This one was four-stranded, made of two scarves folded in half and looped together, and sort of improvised. You could just as easily group two ends together, and make a regular three-stranded braid.
 I'm going to play with some larger flat braids, and see what they look like (stay tuned). So far, this looks like a nice way of dressing up a plain scarf, using some of those scarves that are too thin to use for a covering on their own. Add it to the list of ways to use a narrow scarf (or two).
I have a long history with braids, in other words. And I love them, they're beautiful. I enjoy playing with different braids for challah, and braiding the dangly edging of my scarves when I'm bored.
I also love playing with braids on my coverings. In the past, I've braided the ends of my scarves, or taken those braided ends and wrapped it around a bun.


This time, I made a braid first, then tied it on around my head.


This one was four-stranded, made of two scarves folded in half and looped together, and sort of improvised. You could just as easily group two ends together, and make a regular three-stranded braid.
Tuesday, March 19, 2013
Useful Links
Guess Who's Coming To Dinner is running a giveaway for a headcovering by myheadcoverings.com. To enter, check our her post, and follow the instructions there (basically, pick something you'd choose from the site if you won the giveaway, and put in in her comments).
In nosing around the myheadcoverings site, I found a lovely set of written instructions for some basic scarf styles. Many of these styles are great stepping-off points for two-scarf variations as well, although those instructions aren't given on the site.
In nosing around the myheadcoverings site, I found a lovely set of written instructions for some basic scarf styles. Many of these styles are great stepping-off points for two-scarf variations as well, although those instructions aren't given on the site.
Subscribe to:
Posts (Atom)